
具体描述
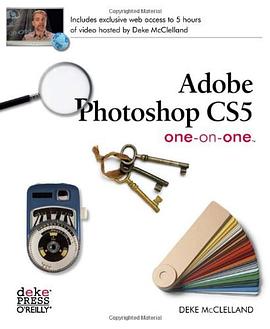
Master the fundamentals of Photoshop CS5 and make all of your images come alive. With Deke McClelland's unique and effective learning system, you get step-by-step tutorials, hours of DVD-video demonstrations, and lots of hands-on projects to help you improve your knowledge and hone your skills. Find out everything you need to know to be productive with Photoshop CS5 right away Learn at your own speed with 12 self-paced tutorials Try out professional techniques with engaging, real-world projects Read about a particular technique and watch the video to see how it's done Follow every key step with hundreds of full-color photos, diagrams, and screen shots Test your knowledge with multiple-choice quizzes in each chapter Adobe Photoshop CS5 One-on-One simulates a classroom environment with one-on-one attention as you proceed from lesson to lesson. Deke's expert advice is like working with a personal coach -- you'll learn Photoshop faster, more creatively, and more efficiently than you thought possible.
Using Content-Aware Fill and Puppet Warp
By Deke McClelland
One of my favorite exercises in my new book employs (count ‘em) two of the coolest new features in Photoshop CS5: Content-Aware Fill and Puppet Warp. Using them together, you can copy an image element from its background to a new layer, fill in the background, and then distort the original subject any which way you like. Here’s a quick play-by-play of the tutorial, which you’ll find explained in detail and helpfully illustrated, from my new book Adobe Photoshop CS5 One-on-One .
1. Open an image. All the exercises in my One-on-One books come with downloadable sample images so you can follow along. For practice, try this on someone whose picture you have handy and you’d like to have temporary if digital control over.
2. Select the subject. The book has loads of advice and techniques for making great selections.
3. Jump the selection to a new layer. Duplicate our subject, aka “Puppet Boy” for later manipulation by pressing Ctrl+Alt+J (Command-Option-J), and give it a name like “Jumping Puppet.”
4. Reload the selection. Reload the selection on the background layer so Content-Aware Fill knows where to do its magic. I’ll show you how to add a little safety zone around the selection as well.
5. Let Photoshop take a crack at filling in the background. Since we’ll be repositioning our puppet-boy’s limbs, we want his background to contain only solid sky, rather than his doppelganger. Here’s how this new feature works: Click the Background layer in the Layers panel to make it active. From the Edit menu, choose the Fill command. In the Fill dialog box, choose Content-Aware from the Use popup menu and click OK . Photoshop assesses the surrounding pixels and makes a pretty good guess on how to fill in the selection. Press Ctrl+D (-D) to deselect the image so you can assess Content-Aware Fill’s work. It’s done a fairly good job for a one-step operation.
6. Heal the ghosts with the healing brush . Yes, Content-Aware Fill is undeniably cool, but you can see that it’s not perfect. (Especially when you know what to look for, the outline of the removed image element is fairly obvious.) To fix those tell-tale shadows use the healing brush (which you can learn about in an earlier exercise in the book.)
7. Convert the Jumping Puppet layer to a smart object . I cover smart objects rigorously in the book, but for now, consider it a simple way to protect your original image and make your steps retraceable.
8. Choose the Puppet Warp command . From the Edit menu, choose Puppet Warp to enter that mode. You’ll notice that your cursor changes to a pushpin with a plus symbol, which indicates that you’ll be adding “pins” as you click with it. Pins let you control how an object stretches in Puppet Warp.
9. Set pins in areas you want to stabilize . Puppet Warp works by allowing you to stretch (or squish) the distance between two pins. Pins also let you lock down your images in places where you don’t want them to move. You can see, I’ve placed pins at key points along our subject’s body that I want to control.
11. Apply the Puppet Warp effect . Move the pins around to stretch our jumping puppet into a cartoonish character. Inside the book, I’ve got a list of tips on how to move and constrain pins to best express your artistic desires. Once you get the position the way you want it, you can either click the checkmark on the right side of the options bar to accept your changes, or simply press Enter or Return.
12. Turn the Type layer into a smart object . Applying Puppet Warp is almost more fun with type than it is with people. But before you can apply the distortion to the type layer, you either need to rasterize the type (i.e., convert it to pixels) or turn it into a smart object. We’ll choose the latter.
13. Re-invoke the Puppet Warp command and distort the individual letters . You can see the pins I set for distorting the other letters in the text layer. For letters like the U and the M, I pulled up the tops of each stroke separately and made sure to anchor the lower points with pins of their own. Each letter acts as a separate object. Finally, I repositioned the subject’s legs to better fit with my text: Just choose Edit > Puppet Warp to re-enter the mode and modify your distortions.
Voila, both subject and text are suitably, if ridiculously, stretched using the magic of Puppet Warp and the background filling convenience of Content Aware Fill.
作者简介
目录信息
读后感
看的是lynda.com 的dvd,好像和这本书的dvd是一样的。 几百个视频算通过各种例子把ps中的工具都解释了,之前看着不知何意的工具经过解释后都很清晰。虽然有些例子做的不够好。特别把photoshop打印相关处理也介绍了,整体算作基础。
看的是lynda.com 的dvd,好像和这本书的dvd是一样的。 几百个视频算通过各种例子把ps中的工具都解释了,之前看着不知何意的工具经过解释后都很清晰。虽然有些例子做的不够好。特别把photoshop打印相关处理也介绍了,整体算作基础。
看的是lynda.com 的dvd,好像和这本书的dvd是一样的。 几百个视频算通过各种例子把ps中的工具都解释了,之前看着不知何意的工具经过解释后都很清晰。虽然有些例子做的不够好。特别把photoshop打印相关处理也介绍了,整体算作基础。
看的是lynda.com 的dvd,好像和这本书的dvd是一样的。 几百个视频算通过各种例子把ps中的工具都解释了,之前看着不知何意的工具经过解释后都很清晰。虽然有些例子做的不够好。特别把photoshop打印相关处理也介绍了,整体算作基础。
看的是lynda.com 的dvd,好像和这本书的dvd是一样的。 几百个视频算通过各种例子把ps中的工具都解释了,之前看着不知何意的工具经过解释后都很清晰。虽然有些例子做的不够好。特别把photoshop打印相关处理也介绍了,整体算作基础。
用户评价
老实说,我当初买这本书的时候,其实是抱着试试看的心态,毕竟市面上关于CS5的资料多如牛毛,真正能深入浅出、兼顾理论与实践的凤毛麟角。然而,这本书的结构设计,简直是教科书级别的典范。它不是那种把所有功能罗列出来的“工具箱说明书”,而是围绕着**“如何像专业人士一样思考和工作”**这一核心主线展开的。我最受震撼的是它对工作流程的梳理。书中会清晰地划分出“前期准备”、“核心处理”、“后期润饰”等几个阶段,并且在每个阶段推荐最适合的CS5工具集。比如,在处理光影和影调平衡时,它并没有止步于介绍“曲线”面板,而是深入探讨了高光、中间调和阴影区域的独立控制逻辑,并通过对比不同的调整层叠加方式,展示了如何避免画面出现“死白”或“死黑”的现象。这种由浅入深、层层递进的叙述方式,极大地提升了我的学习效率。我不再是零散地学习功能点,而是开始构建起一个完整的、有逻辑的后期处理体系。对于已经有一定基础的设计师来说,这本书也提供了许多可以拓展思路的“捷径”和“高级技巧”,例如关于动作(Actions)的批量处理设定,以及如何高效地管理和调用自定义笔刷预设,这些都是能显著提升工作效率的实战干货。
我是一个对细节有着近乎偏执要求的摄影爱好者,过去我总觉得我的照片总缺点“灵气”,总是在后期调整中迷失方向。这本书的出现,彻底改变了我的窘境。它在关于**“精确局部调整”**的章节里,简直是如同艺术品一样精雕细琢。它不仅仅是教你怎么使用“加深/减淡工具”,而是深入剖析了如何根据主体的情绪和视觉焦点来设计光影的走向,并巧妙地结合了选区工具的运用。我记得有一课是关于如何重塑人像面部光线的,书中详细演示了如何利用混合模式和低透明度的画笔,在不破坏原有皮肤质感的前提下,模拟出棚拍般的立体感。那种对细节的极致追求和对工具的掌控能力,通过文字和图示的完美结合,被清晰地传递了出来。看完那一章,我再回头看我以往的作品,顿时明白了之前总是“用力过猛”,缺乏微妙过渡的症结所在。这本书的价值,已经远远超越了一本软件教程的范畴,它更像是一本关于**“视觉美学与数字光影的实践指南”**,让我对PS的理解从“工具操作”上升到了“视觉表达”的层面。
这本关于 Photoshop CS5 的“一对一”系列图书,简直是为我这种对图像处理心怀敬畏却又不知从何下手的“小白”量身定做的!我记得我刚拆开那厚厚的精装本时,心里就涌起一股莫名的踏实感。它不像那些动辄堆砌术语的参考手册,更像是有一位经验极其丰富、耐心无限的导师,坐在我身边,一步一步地掰开了、揉碎了,讲解每一个工具的真正奥秘。特别是关于图层蒙版的讲解,以前看其他资料总是云里雾里,但这本书里,它用了一整章的篇幅,通过好几个实战案例,让我真正理解了“非破坏性编辑”这个听起来高深莫测的概念是如何在实际操作中发挥巨大作用的。那种感觉就像是突然被授予了一把万能钥匙,过去那些让我抓耳挠腮的复杂合成和精细抠图难题,忽然间就变得清晰可循。书中的排版设计也非常人性化,大量的截图和详细的鼠标点击步骤说明,确保了即便是初次接触CS5的用户,也不会因为信息量过大而感到不知所措。我尤其欣赏它在基础概念讲解上的深度,它并没有急于展示那些炫酷的特效,而是花费大量篇幅打磨用户对色彩空间、分辨率以及工作区自定义的理解,这些“地基”的牢固,为我后续学习更高级的技巧打下了极其坚实的基础。这本书真正做到了“授人以渔”,让我从单纯的模仿操作,逐步发展出自己的图像思维。
如果让我用一个词来总结对这本《Adobe Photoshop CS5 One-on-One》的感受,那一定是**“系统性”**。很多同类书籍往往只关注某个特定领域,比如专门讲人像精修或者专门讲特效合成,但这本书的宏大之处在于,它提供了一个完整、闭环的学习路径。它从最基础的CS5界面布局、工具箱的重新认识开始,稳步推进到色彩管理、高级选区构建,直至最终的文件导出优化。这种全景式的覆盖,保证了读者在学习过程中不会留下任何知识的“盲区”。对我这个需要同时处理平面广告和网页素材的自由职业者来说,这本书记载的知识广度和深度都是恰到好处的平衡点。它不仅让我精通了CS5的强大功能,更重要的是,它教会我如何根据项目的具体要求,灵活地组合和调用这些工具,形成一套属于自己的、高效且可靠的工作流。这本书的价值,绝对值得每一位认真对待数字图像处理工作的人收藏和反复研读。
这本书的语言风格非常独特,它不像那些学院派教材那样板着脸孔,也不同于网络教程的轻浮随意。它采用了一种非常**专业而又略带幽默感的叙事口吻**,读起来非常享受,让人感觉仿佛在与一位经验丰富的前辈进行一对一的私塾交流。我尤其喜欢书中穿插的那些“老鸟提示”或者“常见误区解析”,这些小小的侧栏信息,往往能帮我避开许多自学过程中必然会犯的低级错误。例如,在讲解液化工具时,它会特别提醒用户注意边缘的过渡处理,防止出现“塑料感”;在讲解锐化时,它会强调“先降噪后锐化”的正确顺序。这些看似不起眼的操作细节,恰恰是区分业余和专业的关键所在。而且,本书的案例选择非常贴近实际工作场景,涉及了商业修图、网页设计元素制作、以及复杂的照片合成等多个领域,这使得我所学到的知识点能够立即在不同类型的项目需求中得到验证和巩固。这种“学即能用,用之高效”的反馈机制,极大地增强了我对学习的持续热情和信心。